A few months ago I started experiencing issues with my Home Assistant setup on Raspberry Pi 3 model B. It appeard to be due to SD card corruption which is a common issue.
I had been thinking for a while to migrate my Home Assistant setup over to my home media server (HP Microserver Gen8) running Debian 10. This finally gave me the push to look into running Home Assistant via a Docker Container on Debian.
Thoughts after running HA Core in Docker for a few months
It’s been several months now of running Home Assistant Core in docker on my HP Microserver and I have to say, it is much faster and responsive than it was on my Raspberry Pi (more than I was expecting).
The limits of the Pi 3 hardware really became noticable after adding many addons in Hass OS. However with my installation on docker (which has no add ons - I’ll get to this later), I am running 16 docker containers and everything feels much smoother. My server has 16gb RAM, dual core processor, so it’s no suprise really.
However there are a few negatives. Running Home Assistant inm your own docker environment is technically Home Assistant Core. It is not the complete OS that you get when installing via the normal Raspberry Pi methods as it’s intended to be run on various operating systems. So you don’t get the supervisor option in Home Assistant or (more importantly) the ability to install addons.
However, this isn’t that much of a big deal when you realise most addons (all the ones I was using) can be installed in docker pretty easily. You can search for downloadable docker containers at Docker Hub. Admittedly, it is a bit more effort configuring the docker-compose.yml file for each container you want to add (I’ll get to this later), as opposed to just clicking a button to download an addon. But once you get the hang of it, it’s no big deal.
Installing on Docker
Here I will share the steps I took for anyone looking to migrate to their own installation on docker.
The official guide is here, but I will dive into a bit more detail.
Some things to keep in mind:
- This was done on Debian 10 but the steps should be similar for Ubuntu and possibly other linux distributions.
- Your addons requirements may be different to mine. The most important ones I needed to make sure existed on docker (which I cover in this guide) are:
There are several others I use too, but for keeping this guide simple I’ll just cover those 3. It should give you an idea of how it works. But if you need help with any others, feel free to drop a comment at the end of the post and I’ll see if I can help out 🙂
Backing up existing HA config files
If you don’t want to setup your HA config from scratch, copy everything from the /config folder on your Pi over to a usb or PC so you can later paste this over to your new HA setup on docker.
Installing Docker
First thing is to install Docker on your system if you don’t have it already. We’ll do all this in a terminal.
Install the pre-requisite packages:
sudo apt-get update
sudo apt-get install apt-transport-https ca-certificates curl gnupg-agent software-properties-common
Add the Docker GPG key:
DIST=debian   # change to ubuntu if using ubuntu
curl -fsSL https://download.docker.com/linux/$DIST/gpg | sudo apt-key add -
Add the apt repository for docker:
add-apt-repository "deb [arch=amd64] https://download.docker.com/linux/$DIST $(lsb_release -cs) stable"
Install the docker engine
sudo apt-get update
sudo apt-get install docker-ce docker-ce-cli containerd.io -y
You can now verify docker is installed by running the below:
docker version
Installing Docker Compose
Docker Compose is technically not needed, however it makes it much easier configuring, maintaining and starting up multiple containers.
To install run the following:
curl -L "https://github.com/docker/compose/releases/download/1.25.5/docker-compose-$(uname -s)-$(uname -m)" -o /usr/local/bin/docker-compose
chmod +x /usr/local/bin/docker-compose
To verify its been installed you can run:
docker-compose --version
Configuring Docker
With docker installed, we should configure a few things.
Start docker on boot
sudo systemctl enable docker
Add user to docker group
We should add the user that will be running docker commands to the docker group, so that the user has the necessary permissions to execute docker commands.
Replace username with your system user:
sudo usermod -aG docker username
Setup Environment Variables for Docker
I recommend creating some system wide variables, which can be used in the docker compose file.
Replace 1000 with the UID and GID of the user that will be running docker. Usually its 1000, but to check run id -u username and id -g username replacing username with your username
Replace Australia/Melbourne with your timezone as formatted here
echo PUID=1000 | sudo tee -a /etc/environment
echo PGID=1000 | sudo tee -a /etc/environment
echo TZ=Australia/Melbourne | sudo tee -a /etc/environment
Now reboot your system for good measure
Setting up docker-compose file
Now the fun stuff.
Firstly, let’s create a docker folder. This will create it in your home folder, but you can have this where ever you want. Just make sure any commands where I reference this folder you update accordingly:
mkdir ~/docker/
And folders for each of our containers to be used later
cd ~/docker/
mkdir -p ./homeassistant/config/
mkdir -p ./homeassistant/config/appdaemon  # if installing appdaemon
mkdir -p ./docker/mosquitto/               # if installing mosquitto
mkdir -p ./mariadb/db/                     # if installing mariadb
Now create a file called docker-compose.yml by executing the command nano docker-compose.yml
Add the below into the file. Remove any parts for containers you don’t want to install, and take note of any comments requiring you to update values such as IP Addresses, passwords, etc.
Note that since this is a yaml file, indentation is important. Also note how we are using the environment variables (TZ, PUID and PGID) we created earlier throughout this file.
version: '3.3'
services:
  homeassistant:
    container_name: home-assistant
    image: homeassistant/home-assistant:stable
    volumes:
      - ~/docker/homeassistant/config:/config
    environment:
      - TZ=${TZ}
    restart: always
    network_mode: host
    depends_on:
      - mariadb    # remove this if not installing mariadb
      - mosquitto  # remove this if not installing mosquitto

  # remove this block if not installing appdaemon
  appdaemon:
    container_name: appdaemon
    ports:
      - 5050:5050
    restart: always
    environment:
      - 'HA_URL=<your HA_URL value>' # eg. http://192.168.1.2:8123
      - 'TOKEN=<your TOKEN value>'   # Long-Lived Token from Home Assistant
      - 'DASH_URL=http://$HOSTNAME:5050'
    volumes:
      - ~/docker/homeassistant/config/appdaemon:/conf
      - ~/docker/homeassistant:/homeassistant
      - /etc/localtime:/etc/localtime:ro
    image: acockburn/appdaemon:latest
    depends_on:
      - homeassistant

  # remove this block if not installing mosquitto
  mosquitto:
    container_name: mosquitto
    restart: always
    ports:
      - 1883:1883
    volumes:
      - ~/docker/mosquitto:/mosquitto
      - /etc/localtime:/etc/localtime:ro
    image: eclipse-mosquitto

  # remove this block if not installing mariadb
  mariadb:
    container_name: mariadb
    image: mariadb
    restart: always
    volumes:
      - ~/docker/mariadb/db:/var/lib/mysql
    ports:
      - 3306:3306
    environment:
      - PUID=${PUID}
      - PGID=${PGID}
      - TZ=${TZ}
      - MYSQL_ROOT_PASSWORD=<password>  # change this to any password you want. Can remove this line after initial setup
Some things worth calling out:
volumes:allows you to persist data between the container and host machine. Eg.~/docker/homeassistant/config:/configmaps~/docker/homeassistant/configon the host machine to/configin the home assistant container. So in other words, to access/configin Home Assistant, go to~/docker/homeassistant/configon your host machinerestart: alwaysensures the conainer always restarts if it stops. If it is manually stopped, it is restarted only when Docker daemon restarts or the container itself is manually restarted.depends_on:allows you to specifiy dependencies between containers.
I also recommend adding Portainer, which is a container that lets you manage all your containers via a webui.
Add the below to the docker-compose.yml file for inluding Portainer:
  portainer:
    image: portainer/portainer
    container_name: portainer
    restart: always
    command: -H unix:///var/run/docker.sock
    ports:
      - 9000:9000
    volumes:
      - /var/run/docker.sock:/var/run/docker.sock
      - ~/docker/portainer/data:/data
    environment:
      - TZ=${TZ}
Now for the magic. To spin up all those containers we defined in the docker-compose.yml file, just run the following:
docker-compose up -d
To check everything is running, you can execute docker ps in a terminal. You can also execute commands like docker stop container_name or docker restart container_name, etc.
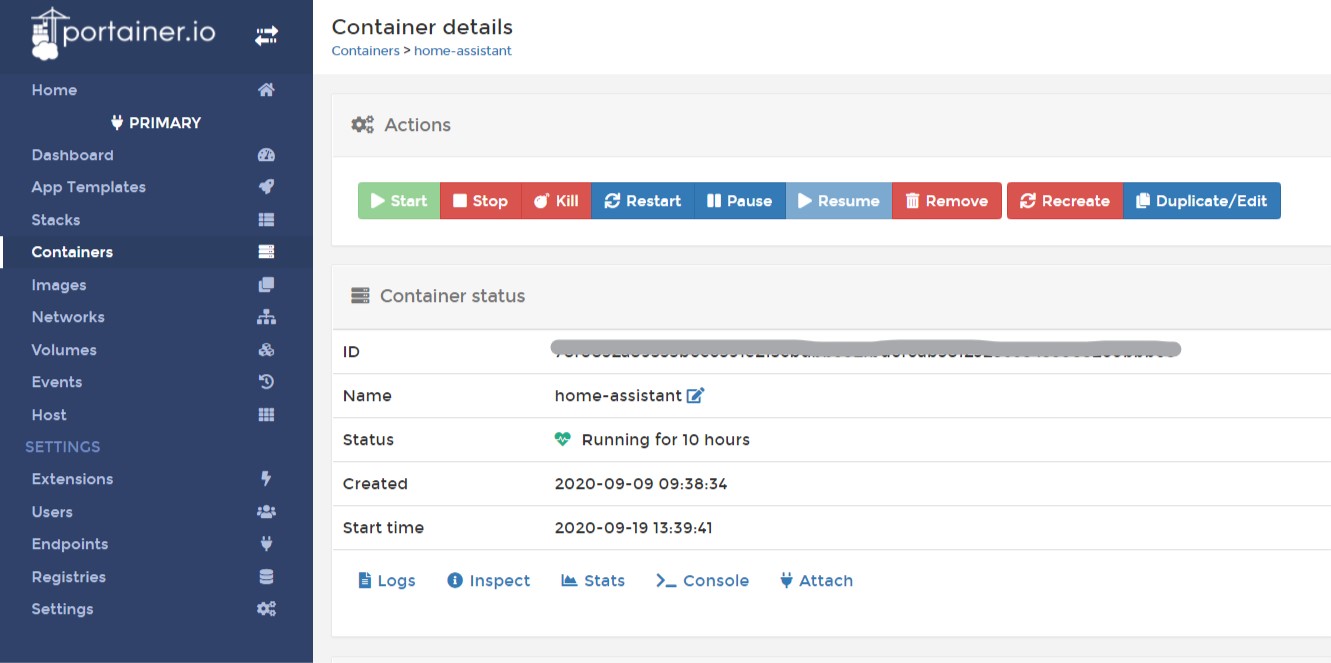
However it is much easier to do all this via portainer. Simply go to http://IP_ADDRESS:9000 on a web browser (replace IP_ADDRESS with the ip address of the machine you’re running docker on) and after logging in, click on containers on the left menu bar to bring up all your container. Clicking on one of those containers bring up a number of options and stats.

Verifying your HA Installation
You can now log in to Home Assistant via http://IP_ADDRESS:8123 and setup your HA from scratch.
If you backed up you /config folder at the start of this guide, stop the HA docker container either in portainer, or by executing docker stop homeassistant. Then copy over your /config contents over to ~/docker/homeassistant/config/. Now you can start HA again either in portainer or by executing docker start homeassistant.
Verify everything got migrated over at http://IP_ADDRESS:8123.
Some additional settings for specific docker containers
Mosquitto
To use the Mosquitto MQTT broker with Home Assistant, it is advisable to setup a user and password on the MQTT broker.
Ensure mosquitto is running and enter the shell of the mosquitto container:
docker start mosquitto
docker exec -it mosquitto /bin/sh
You should now be in the mosquitto container’s shell and can run below commands within the actual container.
First we will setup user/password authentication for the MQTT broker (this will be the login details we will use for connecting HA to this MQTT broker). Replace <username> to any username you desire:
mosquitto_passwd -c /mosquitto/config/passwd <username>
Then, you will be asked to enter a password and confirm it.
You can view the contents of the created file:
cat /mosquitto/config/passwd
# this should outpput in the format: <username>:<encrypted_password>
Now let’s modify mosquitto.conf with some settings, including disabling annonymous login and using the above created user/password:
echo "persistence true" > /mosquitto/config/mosquitto.conf
echo "persistence_location /mosquitto/data/" >> /mosquitto/config/mosquitto.conf
echo "allow_anonymous false" >> /mosquitto/config/mosquitto.conf
echo "password_file /mosquitto/config/passwd" >> /mosquitto/config/mosquitto.conf
Now exit the mosquitto shell and restart mosquitto:
exit
docker restart mosquitto
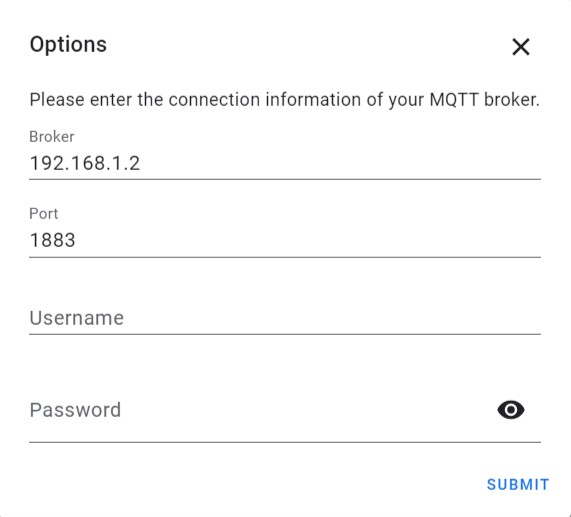
In Home Assistant, you can now add the MQTT integration: [configuration] > [integrations] > [add] > [MQTT] and enter the IP address of the mosquitto container (should be the same as your Home Assistant IP), port is 1883, and the user and password you created above.

MariaDB
We need to create a user and database on MariaDB for Home Assistant to use as its database backend.
Ensure MariaDB is running and enter the shell of the MariaDB container:
docker start mariadb
docker exec -it mariadb /bin/bash
Connect to the MariaDB server via mysql client with the root user. When prompted, enter the password you specified in docker-compose.yml:
mysql -u root -p
You should now be connected to the mysql console. Run the following SQL commands one at a time. In this example I am using the username ha_user and password my_strong_password. Change as needed:
CREATE DATABASE homeassistant;
CREATE USER 'ha_user' IDENTIFIED BY 'my_strong_password';
GRANT ALL PRIVILEGES ON homeassistant.* TO 'ha_user'@'localhost' IDENTIFIED BY 'my_strong_password';
GRANT ALL PRIVILEGES ON homeassistant.* TO 'ha_user'@'%' IDENTIFIED BY 'my_strong_password';
FLUSH PRIVILEGES;
exit
That takes care of what is needed on MariaDB side. We can now exit the MariaDB shell:
exit
Now we can modify our Home Assistant configuration.yaml by adding the below (make sure you change the <IP_ADDRESS> part.):
recorder:
  db_url: 'mysql://ha_user:my_strong_password@<IP_ADDRESS>:3306/homeassistant?charset=utf8'
Restart Home Assistant, and it should now be using MariaDB SQL backend for its database. Keep an eye on Home Assitant logs (eg. via tail -f ~/docker/homeassistant/config/home-assistant.log) in case any errors about connecting to MariaDB come up.
Updating HA and other containers
To update the home assistant container to the latest version as new versions come out, I run the below:
# Pull the latest image
docker-compose pull homeassistant

# Recrate the docker container using latest image
docker-compose up --build -d homeassistant

# Delete old docker images
docker image prune -f
For updating other docker containers, replace homeassistant above with the name of the docker service you want to update (eg. appdaemon, mosquitto, mariadb, etc). Or you can leave out this part completely and it will update all docker containers.


Comments